

Pico SDK
Download the pico SDK from the official GitHub into your chosen directory. I don't like looking at it, so I put it in a hidden folder.
mkdir ~/.picob && cd ~/.pico
git clone https://github.com/raspberrypi/pico-sdk.git
Add the SDK to your PATH. I like using zsh instead of bash.
nano ~/.zshrc
append the following lines to the bottom of the file
export PICO_SDK_PATH="/home/nathan/.pico/pico-sdk"
Log out and back in to update the PATH or
. ~/.zshrc
add sub-modules
cd ~/.pico/pico-sdk/
git submodule update --init
Picotool (optional)
download code, compile, move to local bin
cd ~/.pico
git clone https://github.com/raspberrypi/picotool.git
cd picotool
mkdir build && cd build
cmake ../
make
sudo cp picotool /usr/local/bin/
Pico-extras (optional)
download code, compile, and add to path.
cd ~/.pico
git clone https://github.com/raspberrypi/pico-extras.git
nano ~/.zshrc
append the following lines to the bottom of the file
export PICO_EXTRAS_PATH="/home/nathan/.pico/pico-extras"
Log out and back in to update the PATH or
. ~/.zshrc
Compile the "blink" example
cd ~/Downloads
git clone https://github.com/raspberrypi/pico-examples
cd pico-examples
mkdir build && cd build
cmake ..
cd blink
make
BOOTSEL Mode
Hold the BOOTSEL button (White color button near the micro USB connector) located on the Pico board while connecting the Pico to the computer.
Find and mount the pico
lsblk -f
look for something like
sde
└─sde1 vfat FAT16 RPI-RP2 0009-4A70`
/dev/sde is the device /dev/sde1 is a filesystem on the device.
sudo mkdir /mnt/usb && sudo chown $USER:$USER /mnt/usb
sudo mount /dev/sde1 /mnt/usb
Copy over the "blink.uf2" file to the pi.
cp blink.uf2 /mnt/usb
It should immediately start blinking.
CONT. for ECE 101
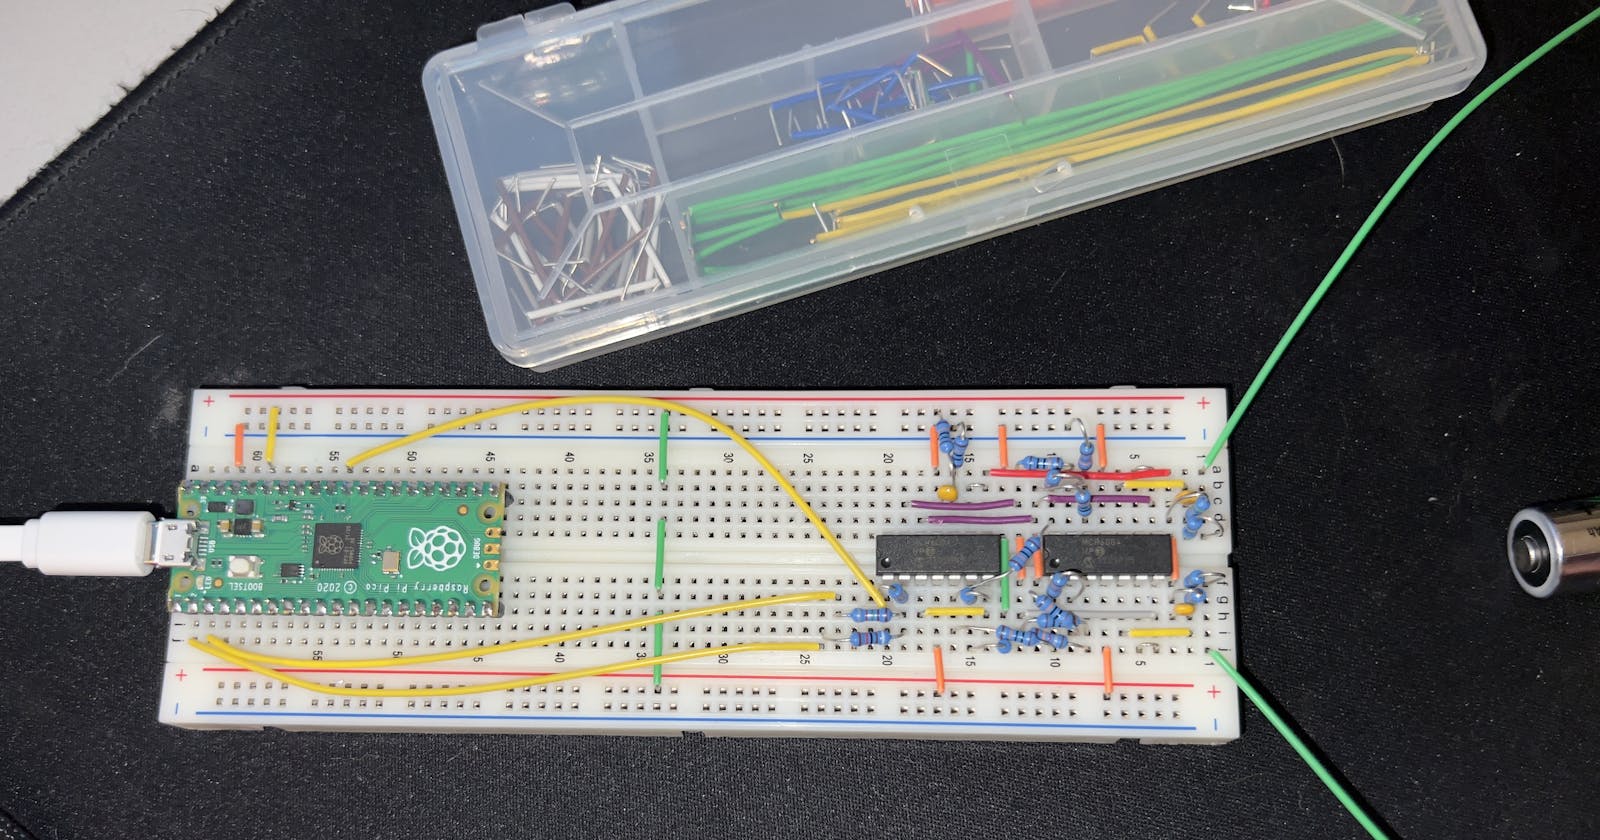
Download the three multimeter files from the course website. Use RMB on each link and select "Save as...". I would include wget/curl commands, but those hardlinks could change. After you download them, copy them to the adc_console directory.
cp adc_console.c digits.c CMakeLists.txt ~/Downloads/pico-examples/adc/adc_console/
Remove the prior builds and compile
cd ~/Downloads/pico-examples
rm -rf build
mkdir build && cd build
cmake ..
cd adc/adc_console
make
put the pi in BOOTSEL mode and copy over .uf2 as shown before.
sudo cp adc_console.uf2 /mnt/usb
Monitor the serial output
There are several ways to do this. I like using screen, but you can use a GUI like Putty or a command line tool like minicom. The first few steps to identify the pico serial interface will still be needed to use the other methods.
First, check the kernel message buffer (basically a system log) for info relating to the pico
sudo dmesg
the output to look for:
[169801.734603] usb 5-1: USB disconnect, device number 4
[169801.735187] device offline error, dev sde, sector 260 op 0x1:(WRITE) flags 0x0 phys_seg 1 prio class 2
[169801.735195] Buffer I/O error on dev sde1, logical block 259, lost async page write
[169802.064671] usb 5-1: new full-speed USB device number 5 using xhci_hcd
[169802.222607] usb 5-1: New USB device found, idVendor=2e8a, idProduct=000a, bcdDevice= 1.00
[169802.222615] usb 5-1: New USB device strings: Mfr=1, Product=2, SerialNumber=3
[169802.222617] usb 5-1: Product: Pico
[169802.222619] usb 5-1: Manufacturer: Raspberry Pi
[169802.222621] usb 5-1: SerialNumber: E66098F29B400D32
[169802.285360] cdc_acm 5-1:1.0: ttyACM0: USB ACM device
[169802.285388] usbcore: registered new interface driver cdc_acm
[169802.285391] cdc_acm: USB Abstract Control Model driver for USB modems and ISDN adapters
specifically, cdc_acm 5-1:1.0: ttyACM0: USB ACM device. /dev/ttyACM0 is the port we can use to talk to the pico.
sudo screen /dev/ttyACM0 115200
To end the session, press Ctrl+A followed by K. Alternatively, press Ctrl+A, type :quit and confirm it by pressing Enter.
With that, you should be connected. As you can see from the screenshot, my multimeter (which only has the pico plugged in - no power supply) is reading 0.02. This shows that I need to calibrate the meter.
